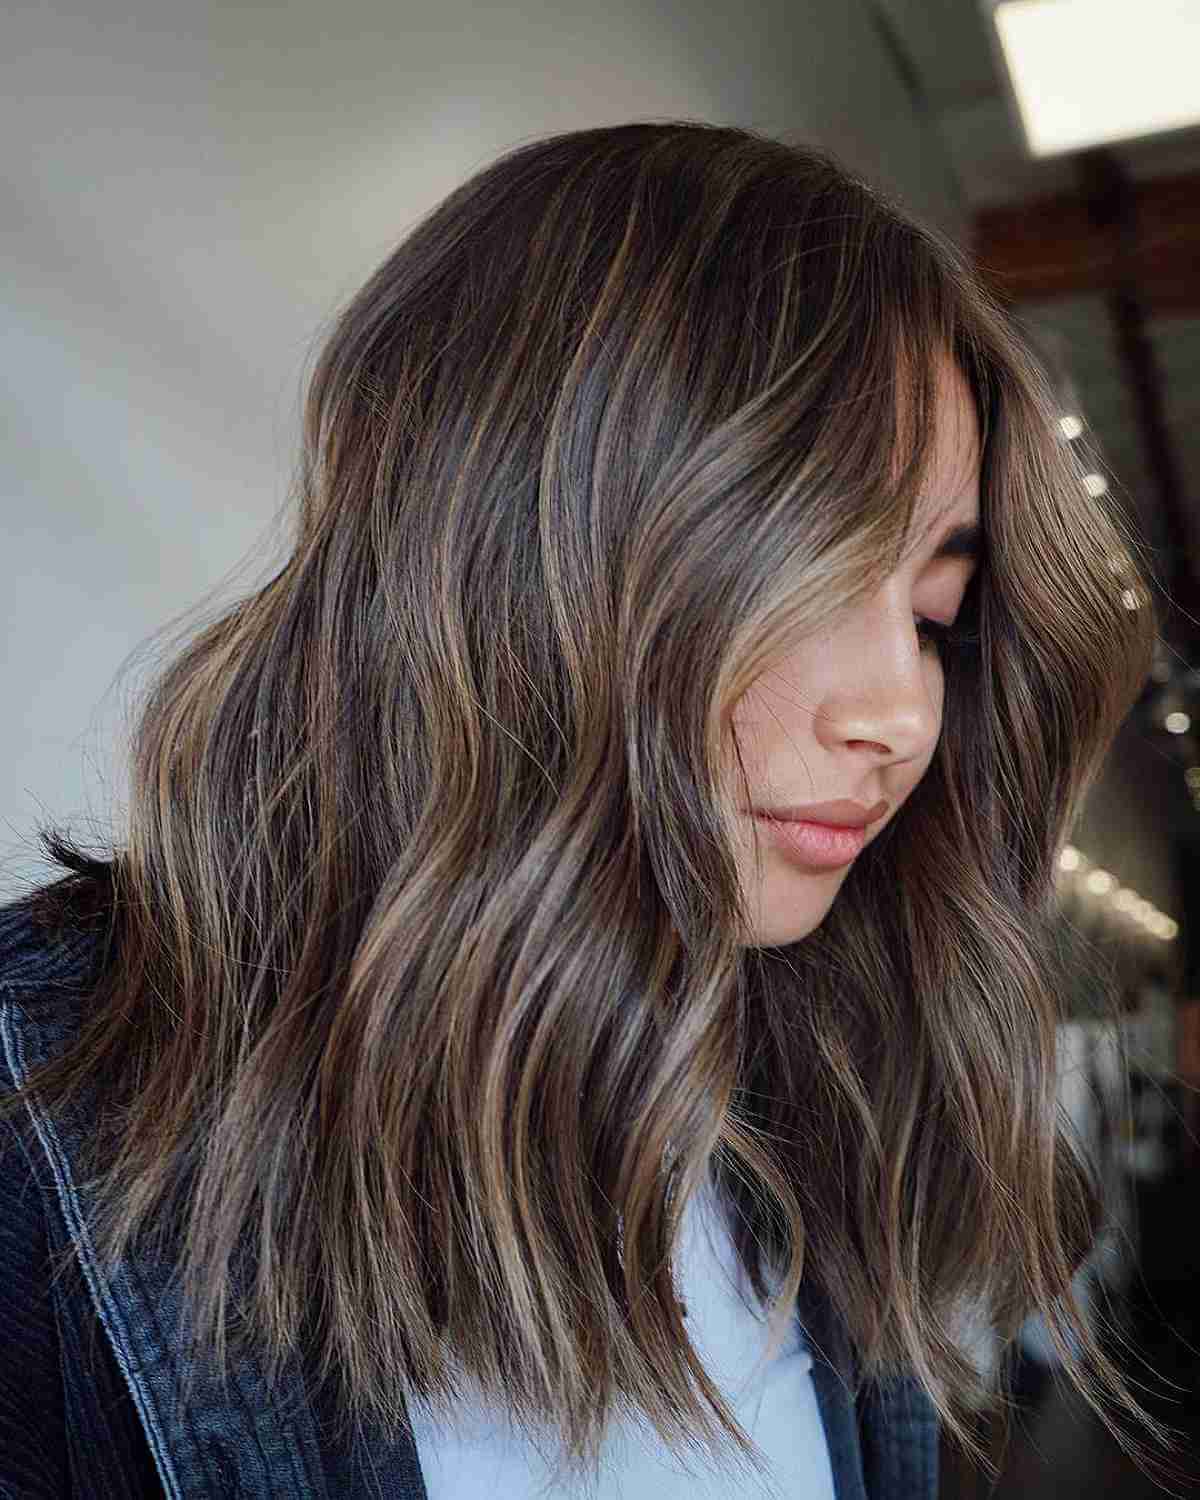
So, you’re hovering in that weird hair purgatory. It’s not short anymore, but it definitely isn't hitting your waist. Honestly, below shoulder length haircuts are the absolute sweet spot for most people, yet they're often the most misunderstood. People think it’s just "long hair," but it’s actually a distinct architectural challenge for your head.
Hair that sits just a few inches past the clavicle has a different weight distribution than a bob or a waist-length mane. It's heavy enough to drag down your volume but short enough that the ends still interact with your clothes, leading to that annoying "flip" or constant tangling at the nape. If you don't get the layering right, you end up with the dreaded "triangle head."
Most of the time, we see celebrities like Jennifer Aniston or Alexa Chung rocking these mid-length looks and think it’s effortless. It’s not. It’s calculated.
The Physics of Mid-Length Hair
When hair passes the shoulders, gravity starts winning. Your roots have to support more weight. This is why many people complain that their hair feels "flat" once it reaches this stage.
If you have fine hair, the density usually starts to look thin at the bottom. Stylists call this the "see-through" effect. To fix this, you don't actually need more length; you need a blunter perimeter. Cutting a thick, horizontal line at the base creates the illusion of fullness. Conversely, if you have thick, coarse hair, the "below shoulder" zone can become a massive shelf. You need internal thinning—not just surface layers—to keep it from looking like a bell.
Why the "Lob" Evolves
Most below shoulder length haircuts start as a Long Bob (Lob) that someone just stopped cutting. But there’s a point—usually around four inches past the shoulder—where the "Lob" logic fails. The front pieces start to drag forward, and the back gets caught on your coat collars.
Layering is Not a One-Size-Fits-All Solution
There is a massive misconception that "layers" solve everything. They don't. In fact, if you have thin hair and ask for heavy layers in a below-shoulder cut, you might end up with three spindly hairs at the bottom that look like rat tails.
For many, invisible layers (or internal layers) are the secret. This is a technique where the stylist cuts shorter pieces underneath the top canopy of hair. It supports the top layer, giving it "lift" without making the haircut look like a 2005 shag. It’s subtle. It works.
Then you have the face-framing bits. If your hair is all one length and hits below the shoulder, it can "bottom-heavy" your face, dragging your features down. Bringing a few pieces up to the cheekbone or chin level acts like a natural facelift. It breaks up the vertical line.
The Shag vs. The Butterfly
We've seen the "Butterfly Cut" explode on TikTok and Instagram recently. It’s basically a high-velocity version of below shoulder length haircuts with massive, bouncy layers. It’s great if you have the density for it. But if you're working with less hair, a modern shag—think more textured, less "flippy"—is usually more manageable.
Real Talk About Maintenance and Tools
Let’s be real: this length is a trap for heat damage.
Because it’s "long enough to style" but "short enough to wash quickly," we tend to over-style it. You’re likely using a flat iron or a curling wand more often than someone with waist-length hair who just puts it in a braid.
- The Brush Matters: For this specific length, a medium-sized round brush is better than a large one. A large one gives you straight hair; a medium one gives you that "C-shape" curve that makes this length look intentional.
- The "Nape Knot": Since the hair rubs against your shoulders and back all day, the hair at the base of your neck will mat. Use a silk scarf or a silk-lined coat if you’re serious about keeping the integrity of the cuticle.
- Trimming Schedule: You need a trim every 8 to 10 weeks. If you wait 6 months, the split ends will travel up the shaft, and you'll have to cut it back above the shoulders to save it.
The Secret Influence of Face Shape
Your jawline dictates where the "transition" in your haircut should happen.
If you have a square jaw, you want your first layer to hit just below it to soften the angles. If you have a long or oval face, you can start the layers higher, around the nose, to add width. Below shoulder length haircuts are incredibly versatile for balancing proportions, but only if you aren't afraid to lose a little bit of hair near the face.
Dealing With the "In-Between" Texture
Most people don't have perfectly straight or perfectly curly hair. It’s usually some weird wavy-frizzy hybrid.
At this length, that texture becomes very obvious. Air-drying often results in a "poof" because the hair isn't heavy enough to pull the wave pattern down yet. If you're committed to air-drying, you need a heavy-duty leave-in conditioner or a salt spray to "clump" the waves. Otherwise, you're fighting the volume.
Product Recommendations for the Mid-Length Crowd
Avoid heavy waxes. They weigh down the ends and make the hair look greasy against your shoulders. Instead, look for "dry finishing sprays." They provide grit and hold without the "wet" look of hairspray. Brands like Oribe or even drugstore alternatives like Kristin Ess have mastered this "textured but clean" feel.
Cultural Shifts in Hair Length
We used to think of hair in two categories: short or long.
But look at the "Old Money" aesthetic or the "Quiet Luxury" trends dominating the 2020s. These styles almost exclusively favor below shoulder length haircuts. Why? Because it looks healthy. It’s easier to keep hair shiny and split-end free when it’s not three years old (which is how old the ends of waist-length hair usually are). It conveys a sense of grooming that "extreme" lengths sometimes lose.
Actionable Steps for Your Next Salon Visit
Don't just walk in and say "trim two inches and give me layers." That’s how you get a generic, dated haircut.
- Bring a "No" Photo: Show your stylist a picture of hair you hate. Often, it’s easier to identify what you don't want (like a shelf-like layer or a certain type of fringe).
- Ask for "Point Cutting": Instead of blunt shears, ask the stylist to point-cut the ends. This softens the line and helps the hair move more naturally when it hits your shoulders.
- Check the "Swing": Before you leave the chair, shake your head. If the hair moves as one solid block, it needs more internal texture. It should move in sections.
- The Shoulder Test: Ensure the stylist cuts your hair while you are sitting up straight. If you slouch, the "below shoulder" measurement will be off the moment you stand up.
Invest in a high-quality microfiber towel. Since this length is the prime candidate for "mechanical breakage" (hair rubbing against things), reducing the friction during the drying process is the easiest way to keep your mid-length hair looking like a choice rather than an accident. Keep the ends hydrated with a lightweight oil—only from the mid-shaft down—and you’ll avoid the "broomstick" look that plagues so many mid-length styles.